Scissor Lift Drive Motor Troubleshooting in Malaysia: Symptoms, Tests, and When to Replace
When an electric scissor lift won’t travel, travels slowly, or trips faults under load, the drive motor is often blamed first. A faster, more reliable approach is to verify the fault step-by-step—starting with power supply and interlocks, then checking the brake and controller, and only then condemning the motor.
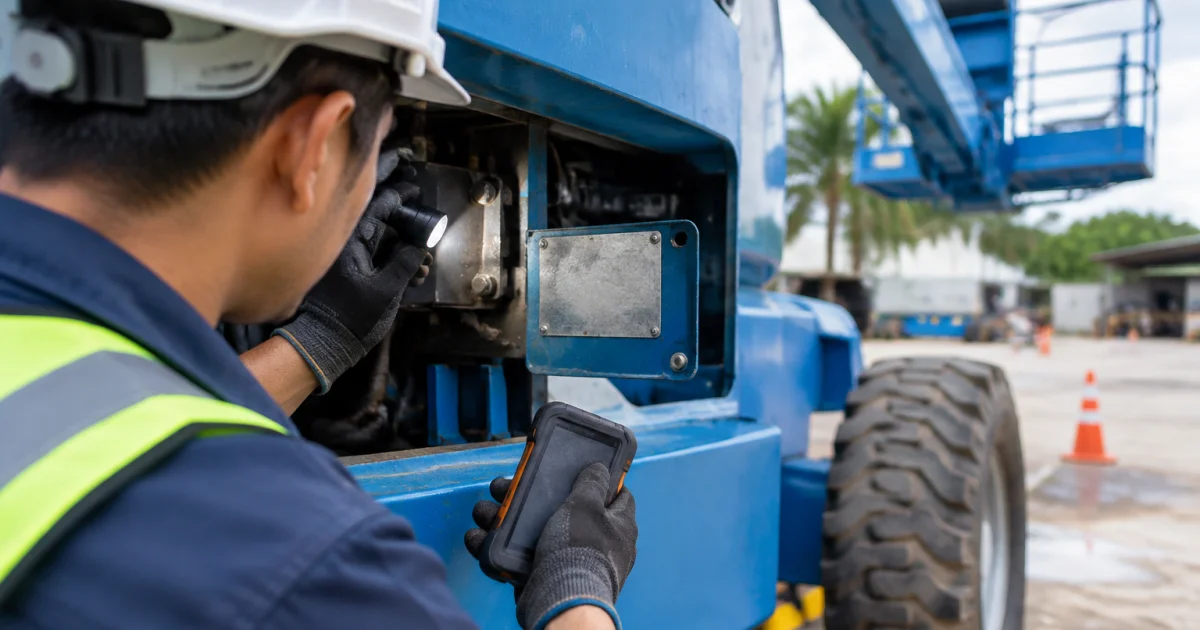
This tutorial is for MEWP repair workshops and technicians handling Scissor Lift Drive Motor Malaysia troubleshooting: how to interpret symptoms, what to test with basic tools, and when replacement is the better downtime decision.
Safety note: Follow the manufacturer service manual and lockout/tagout. Chock wheels, isolate batteries, and keep the platform stowed unless a controlled travel test requires otherwise.
Step 1: Confirm the exact symptom (and reproduce it safely)
Start by documenting what the operator sees and what the machine does. “No drive” can come from very different causes.
- No movement at all: commonly an interlock/enable issue, dead power, or an open contactor circuit.
- Contactors click but no travel: low voltage, brake not releasing, seized gearbox, or motor failure.
- Jerky / pulsing travel: weak batteries, poor connections, intermittent brake coil, or feedback/command issues (model-dependent).
- Slow travel (worse on slopes): voltage sag, high resistance cables, DC brush wear, failing windings, or brake/tyre drag.
- One direction only: command input, wiring, or controller output channel problems.
- Trips drive faults under load: battery condition, controller current limit, insulation breakdown, or mechanical binding.
Reproduce the fault in a controlled test area. If the unit moves, compare behavior unloaded vs loaded (using safe test procedures) because voltage sag and brake drag usually worsen under load.
Step 2: Quick checks that eliminate “not the motor” causes
Many “motor” complaints are upstream power, interlock, or mechanical drag problems. These checks are quick and prevent unnecessary parts replacement.
2.1 Batteries and charger output (common on electric scissor lifts)
Weak batteries may still run lift functions but collapse under drive current. Prioritize this if travel is sluggish, contactors chatter, or the unit dies when drive is commanded.
- Visual inspection: swelling, leaks, corrosion, loose hold-downs, heat-discolored lugs.
- Connection integrity: tug-test crimps; check for warm/hot lugs after a short drive attempt.
- State of charge: confirm the charger completes a full cycle; investigate charger faults or mismatched charging profiles.
If you suspect the charger, confirm voltage and charging profile compatibility. Many workshops isolate this quickly by testing with a known-good charger.
2.2 Tyres, brakes, and rolling resistance
A “weak motor” symptom is often the motor fighting drag. Check:
- Tyres: flat-spotting, delamination, or debris binding the wheel.
- Bearings/hubs: rough rotation or grinding indicates mechanical load.
- Brake release: partial release can cause jerking, stalling, or protection trips.
If the manual allows, raise the drive wheels safely and confirm both sides rotate freely when released, and the gearbox feels smooth without binding.
2.3 Interlocks and command inputs
Drive enable circuits can block travel while other functions still work. Confirm:
- Emergency stop circuit (platform and ground) is healthy.
- Enable/footswitch/deadman switch operates correctly.
- Tilt alarm and overload systems are not inhibiting travel.
- Drive/steer joystick signals change smoothly (no dead spots).
If drive comes and goes when you move the joystick or harness, suspect joystick, connectors, or wiring before the motor.
Step 3: Electrical tests you can do before removing the motor
After clearing basics, determine whether correct power reaches the motor under load and whether the system is losing voltage through resistance.
3.1 Visual and thermal clues
Inspect for burned insulation, melted connector housings, and discolored cabling near the motor, contactors, and fuses. A sharp varnish-like odor can indicate overheated windings.
After a brief, controlled drive attempt, check for localized heat at:
- Battery terminals and main disconnect
- Contactors and fuse holders
- Motor studs and crimp lugs
- Brake coil wiring
Heat at a lug or holder usually means resistance at that joint—and that can be the real cause of low motor voltage.
3.2 Voltage drop test (most useful “real-world” measurement)
Open-circuit voltage can look normal even when the circuit collapses under load. Measure voltage at the motor terminals while commanding drive (wheels safely off the ground if needed).
- Voltage stays high but motor doesn’t turn: suspect brake not releasing, seized gearbox, or motor failure.
- Voltage drops heavily at the motor: suspect batteries, main cables, contactors, fuses, or connector resistance.
- Low voltage only in one direction: directional path/wiring/controller channel issue.
Compare battery voltage vs motor-terminal voltage at the same moment. The difference is the circuit drop. A large drop typically points away from the motor and toward wiring/contacts.
3.3 Continuity and insulation sanity checks
With power isolated:
- Continuity: verify harness continuity from controller/contactor output to the motor.
- Short to chassis: check for unintended continuity between motor leads and frame/ground.
If available, use an insulation resistance tester (megger) where appropriate. Otherwise, at least rule out obvious shorts, pinched harnesses, and damaged insulation before removing the motor.
Step 4: Motor vs brake vs controller—how to isolate the culprit
At the wheel end, faults typically involve the motor, gearbox, brake, or the upstream controller/wiring. Isolation means proving which element fails under the same command conditions.
4.1 Check brake release function (don’t skip this)
Electromagnetic brakes can fail mechanically (sticking) or electrically (coil open/short). The symptoms often mimic a failing motor.
- Listen/feel: on drive command, do you get a consistent brake “click”?
- Measure coil supply: confirm brake coil voltage is present when drive is enabled.
- Resistance check: with power isolated, compare coil resistance left vs right (if dual drive). Large mismatch is suspicious.
If one brake doesn’t release, the lift may pull, jerk, stall, or trip current limits. Fixing the brake circuit can restore travel without replacing the motor.
4.2 Compare left vs right drive (dual drive machines)
With two drive motors, use side-to-side comparison:
- Compare motor voltage during the same drive command.
- Compare brake coil behavior and resistance.
- If permitted by the manual/design, swap downstream connections/components to see whether the fault follows the motor or stays with the circuit.
If the “bad” side stays bad after swapping, focus on wiring/controller output rather than the motor.
4.3 Signs the controller is limiting current (and why it matters)
Drive controllers protect against undervoltage and overcurrent. A good motor may feel weak if the controller limits because:
- batteries sag below low-voltage threshold,
- high circuit resistance creates excessive drop, or
- mechanical drag forces high current and the controller backs off.
Replacing a motor without correcting the cause of limiting often produces no improvement. Treat limiting as a symptom—then find what triggers it.
Step 5: When to replace the drive motor (repair vs replace decision)
After confirming the motor is the root cause (or the most economical fix), choose repair vs replace based on reliability, turnaround, and fleet downtime tolerance.
Replace the motor when you see these conditions
- Burnt smell, discoloration, or visible overheating after short runtime.
- Intermittent internal open circuit that appears with heat/vibration.
- Fails under load despite correct voltage reaching the motor (e.g., works wheels-up, stalls wheels-down).
- Water ingress/corrosion inside the motor.
- Integrated motor/gear unit contamination or seizure where replacement is more reliable than on-site rebuild.
Consider repair when these conditions apply
- The fault is clearly external (cables, lugs, contactors, connectors).
- DC brush wear is the only issue and you can refurbish and test properly.
- Lead time/availability favors a controlled rebuild and the customer accepts turnaround and risk.
In Malaysia, correct motor identification is critical. Even “similar” motors can cause poor performance, controller faults, or premature wear if specs and interfaces don’t match.
Step 6: How to order the correct drive motor (avoid misidentification)
Accurate ordering prevents repeat downtime. Capture:
- Machine make/model and serial number
- Motor nameplate details (voltage, part number, stamped codes)
- Photos of terminals/connectors, brake wiring, and mounting interface
- Symptom + test results (motor voltage under load, brake checks, one side vs both)
For mixed fleets (Genie, JLG, Skyjack, Haulotte, Dingli, Manitou, and others), treat each unit as a configuration; drive packages can vary within the same model family by production run.
Because drive issues can involve related components (brakes, contactors, joysticks, electrical modules), sourcing through a supplier focused on Scissor Lifts Parts Malaysia can reduce misorders and speed up turnaround.
Related parts that often solve “motor problems” faster
Travel is often restored without motor replacement by fixing higher-failure-rate components:
- Batteries and chargers for undervoltage and sag-under-load
- Joysticks and control components for intermittent command and direction faults
- Brake components where drag or non-release causes stalling
- Tyres and wear parts that increase rolling resistance and current draw
For quick sourcing, start from the most relevant category or exact-match product page, such as scissor lift parts and components for common fleet items.
Useful next reads and parts references
- Maintenance tips for boom lifts and scissor lifts in Malaysia
- Solid vs foam-filled tyres for boom and scissor lifts
- Genie GS hydraulic brake (example replacement part)
- Genie GS hydraulic motor (example motor listing)
Conclusion: A repeatable workflow that prevents unnecessary motor swaps
Effective drive troubleshooting is about proving the fault path: confirm the symptom, eliminate battery/charger and interlock causes, measure motor voltage under load, verify brake release, and compare left vs right on dual-drive machines. Then decide whether the motor is actually failing or the system is limiting due to voltage drop or mechanical drag.
When replacement is needed, order using the correct serial number and motor details to avoid mismatched parts and extended downtime—especially for mixed fleets common in Malaysian rental, construction, and facility maintenance operations.
Frequently Asked Questions
What are the most common symptoms of a failing scissor lift drive motor?
Common signs include slow or weak travel under load, jerky/pulsing movement, one-direction drive problems, repeated drive faults when climbing ramps, overheating smells, and a motor that receives normal voltage but won’t turn. Always rule out brake drag, battery sag, and high-resistance connections first, because they can mimic motor failure.
How do I test a scissor lift drive motor without removing it?
Start with a voltage drop test: measure battery voltage and motor terminal voltage while commanding drive. If the motor voltage stays healthy but the wheel doesn’t rotate, suspect brake release problems, mechanical binding, or an internal motor fault. If voltage collapses at the motor, trace the drop through batteries, contactors, fuses, cables, and connectors.
Can a bad brake cause a “no drive” complaint on an electric scissor lift?
Yes. A sticking or non-releasing electromagnetic brake can make the lift stall, jerk, or trip drive protection, even if the motor is good. Check for brake click on drive command, verify brake coil supply voltage during drive enable, and compare coil resistance left vs right on dual-drive machines.
Why does my scissor lift drive fine with wheels lifted but not on the ground?
Wheels-off-ground tests reduce mechanical load, so weak batteries, high-resistance wiring, dragging brakes, worn tyres, or a motor that can’t produce torque will be masked. Repeat measurements under realistic load (in a safe test area) and compare battery voltage vs motor voltage during the drive command to find sag or drop.
What information should I provide to order the correct replacement drive motor in Malaysia?
Provide the lift make/model and serial number, motor part number or nameplate details (voltage and codes), clear photos of terminals/connectors and mounting points, and your test notes (motor voltage under load, brake checks, and whether the issue is one side or both). This helps parts teams match the correct variant and avoid misorders.
Get the right scissor lift drive parts—without trial-and-error
If your troubleshooting points to a failing drive motor, brake, joystick, charger, or wiring component, SSL Access Parts can help you identify the correct replacement using your machine model and serial number. Choose genuine or quality aftermarket options, backed by local support and fast delivery options to reduce downtime for your fleet.
Disclaimer Statement:
We hope you found this article helpful. Our content is intended for general informational purposes only and does not constitute advice or necessarily reflect the full range of services offered by SSL Access Parts Sdn. Bhd. While we strive to provide accurate and up-to-date information, we recommend consulting with an expert or referring to the manufacturer’s guidelines for specific advice or repairs. Any use of the equipment mentioned should comply with safety standards and regulations. SSL Access Parts Sdn. Bhd. is not liable for any actions based on the information provided and cannot guarantee the absence of errors or omissions.